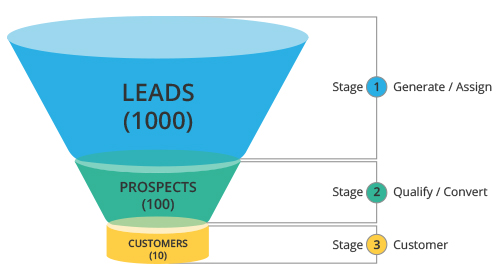
Online Help > User Manual > Working with Leads

Working with Leads

Tags:  


Leads
 are raw details gathered about an individual or representatives of an organization.
They play a very important role in an organization's Sales & Marketing department and are useful in identifying potential customers. Collecting leads and managing them are the initial stages in the sales process. Leads can be obtained through trade shows, seminars, advertisements, marketing campaigns etc. Once the leads are collected, it is essential to manage them and follow them up till the leads qualify to prospective customers. The sales department's approach in managing leads can significantly impact the success of an organization. This is essential hence, the Business world considers Lead management as one of the most important activities in the sales & marketing process.

The terminology related to Lead management may differ across industries, but the basic process remains the same. The Leads module in Zoho CRM is useful in managing your Leads. In the Zoho CRM system, Lead details contain a combination of company (account), person (contact), and business opportunity (potential). Zoho CRM is used for managing both Business to Business (B2B) and Business to Consumer (B2C) scenarios.

Lead Management Process

  1. Customize lead related fields in lead page according to your organization's Sales & Marketing processes (You may use the existing fields, disable some of the standard fields, or add new custom fields).
  2. Setup lead generation process by filling the lead form, importing lead data from external sources, or capturing leads directly from your Web site using web to lead forms.
  3. Assign leads to the correct sales persons/partners using the Lead Assignment rules.
  4. Qualify the leads as potentials by following-up till the lead reaches a certain stage. Later, convert the 'Lead' to 'Potential'. While converting leads to potentials, accounts and contacts are created automatically.
  5. Follow up the leads further in the Potentials module, till the deal is either won or lost. All the converted leads status is changed to "Converted", which can be used for future reference.


Sales Funnel Diagram

From a Lead to a Customer:

  • Every person who signs up with Zoho CRM becomes a "Lead" and probably a prospective "Customer".
  • Once a Lead is generated, the Zoho CRM system automatically assigns the particular lead to a Sales Person/Partner, provided the Lead Assignment Rules are defined.
  • The Sales person/Partner performs the validation (or background check) of the lead and analyzes the opportunities available with the same. The leads are then filtered based on these opportunities.
  • If the opportunities are positive, the lead becomes a "Potential" or a possible customer("Prospect").
  • A Potential becomes a "Customer" once the deal gets finalized.

Note:

  • Standard fields in the Leads module are applicable to most of the industries. If your organization requires additional fields, your System Administrator can add them using product customization module.
  • In the Zoho CRM system, lead information is a combination of company as well as the person's contact information.

Navigate Leads

Search Leads

Create Custom List Views

(Access Privilege: Read/Write)

The Leads Module has a View option that consists of standard view modes (that are predefined by default) and custom view modes (that can be created by the user). These options enable you to view the records based on the view mode selected. For instance, when you select the view mode as "Unread Leads", you can to view only the unread lead records. You can do the following:

  • Standard Views: You can modify the standard views and sort the order of the columns in the list. You can delete this view mode, provided you have been given the access to do so by the administrator.
  • Custom Views: You can create new view modes, modify, delete custom views, and sort the order of the columns in the list.

By default, the following standard view modes are available in the Leads module:

  • Predefined Views
    • All Open Leads
    • My Leads
    • Today's Leads
    • Converted Leads
    • Unread Leads
    • My Converted Leads
    • Mailing Labels
  • Recent Views
    • Recently Created Leads
    • Recently Modified Leads
    • Recently Viewed Leads

Note: User created list views are displayed under User Created Views category in the View drop-down list.

Refer Managing List Views to learn more about creating list views.

To create custom views

  1. Click the Leads tab.
  2. In the Leads Home page, click Create View.
  3. In the Create New View page, do the following:
    1. Under View Information section, enter the name of the custom view in the View Name box. .
    2. Under Specify Criteria section, specify the filter criteria. 
    3. Under Choose Columns section, select the columns to be displayed in the View mode that you create. 
    4. Under Accessibility Details section, define the user accessibility to view the custom view modes. 
  4. Click Save. The custom list view is displayed in the View drop-down list.

Note: In the View drop down list, the standard view modes are displayed. You can only rearrange the order of the columns or add more columns.

Create Leads

(Access Privilege: Write)

In Zoho CRM, you can create leads by:

  • Entering data manually into lead details form
  • Importing leads from external sources
  • Capture leads from Web site through Web-to-Lead form

Note: Some of the standard fields listed below may not be visible/editable depending on your organization business process and field-level security settings. In case you want to added/modified fields, please contact your System Administrator for more details about usage of the other fields.

To know the List of Standard Lead-related Fields and the mandatory fields, click here.

Create Leads Individually

Leads can be created manually, one by one. Consider the scenario: Suppose, you met a person during travel, seminars etc, who showed some interest in your product/service. You exchanged business cards and assured that you would contact him/her again with more details about the product/service. The next day, you create a lead manually with the available details and contact the person for a deal. In such cases, it is easy to manually feed in the available details and create new lead records instantly.

You can create individual leads by:

  • Filling details in the lead creation form.
  • Using Quick Create option; a quick create component present in left pane of the Leads Home page.
  • Duplicating the lead with few changes in the existing lead details.

Note: By default, the person who creates the lead owns the lead. If you want to assign the lead to a different user, click the Change link in the Lead Owner field from the "Lead Details" page and select another user as the lead owner .

To create leads individually

  1. In the Leads module, click New Lead.
  2. In the Create Lead page, enter the lead-related information.
  3. Click Save.The lead details are displayed in Lead Details page where you can perform the additional operations. Refer section Associating Leads with Other Records, for more details.

    Note: The Last Name and Company fields are mandatory. Refer section List of Standard Lead-related Fields, for more details.

To create leads instantly

  1. Click the Leads tab.
  2. On the left pane of the Home page, under the Quick Create section, select "Leads" from the drop down list.


  3. In the screen that appears, enter the relevant details, and then click Save. The lead details are displayed in Leads Home page, where you can update the additional details.

To create duplicate leads

  1. Under the Leads tab, click a particular lead that you want to be duplicated.
  2. In the Lead Details page, click Clone.
  3. In the Clone Lead page that appears, modify the required lead details.
  4. Click Save. Lead details are displayed in the Leads Home page, where you can update the additional details.

Import Leads

Capture Leads from Website (Web-to-Lead Form)

Merge Duplicate Leads

Over a period, there may be a chance of accumulation of duplicate leads. You can merge these duplicate leads for a better organization of your leads.

To merge duplicate leads

  1. Click the Leads tab.
  2. In the Leads Home page, click the required lead under the Lead List section.
  3. In the Lead Details page, click the Find & Merge Duplicates button.
  4. In the Find Duplicate Leads page, do the following:
    1. Under the Search Criteria section, by default the some of the matching criteria and the corresponding values are displayed. Add additional criteria if required. Click the Search button.
    2. Under the Matching Leads section, select the leads to be merged.
    3. Click the View Duplicates button.
  5. In the Merge Leads page, select the fields to be updated to master record. All the duplicate fields are highlighted with a different color.
  6. Click the Merge button. The fields details will be merged with the master lead record and lead details page is displayed for further operations.

Associate Leads with Other Records

(Access Privilege: Read/Write permission)

After creating leads, you may need to associate leads with other records, such as tasks, events, E-mails, products, attachments, and notes until the lead is reached to a certain stage where it can be converted to potential as per your organization's sales process.

To associate lead with other records

  1. In the Lead: <Lead Name> page, you can update the following details:
    • Open Activities: To add tasks and events (meetings, and calls).
    • Closed Activities : To archive the closed activities.
    • Products: To add products to the lead.
    • Attachments & Notes: To attach documents and notes to the lead.
    • Mails: To archive the sent email messages as part of the mass mailing.
    • Notes: To add notes to the lead.
  2. After updating the associated records, you can work with the next record.

Send Email to Leads

(Access Privilege: Mass Email Leads)

You can send bulk Emails to the selected leads from the Leads module. Before sending E-mail, ensure that the lead contains a valid Email address; otherwise, Email will not be sent to the corresponding lead.

Note: You can send only 250 emails per day (12 AM to 11.59 PM PDT is considered as one day).

To send Emails to individual leads

  1. Click the Leads tab.
  2. In the Leads: Home page, select the lead under the Lead List View section.
  3. In the Lead Details page, go to Mails related list view and click the Send Mail button.
  4. In the Compose Mail page, enter the email message, attach files, add additional email IDs in CC & BCC fields, and finally click the Send button. An Email will be sent to the recipients and copy of the mail is stored under Mails related list view.

To send E-mails to a group of leads

  1. Click the Leads tab
  2. In the Leads: Home page, scroll down to Lead Tools section and click on Mass E-mail Lead.
  3. In the Mass E-mail page, do the following:
    • By default, the E-mail Template tab is enabled. Select the template to be used from the E-mail Template pick list. The template content is displayed under E-mail Template Body section.
    • Click Matching Criteria tab. You can create a leads mailing list by specifying the matching criteria under Specify Criteria section.
  4. Click the Send button to send the E-mail message to the selected leads.

Export Leads

(Access Privilege: Data Export Permission)

Convert Leads to Other Sales Records

(Access Privilege: Lead Conversion permission)

Once lead status has reached a certain stage, where it can be qualified as an potential, i.e., there is a chance of further negotiations with the lead, it can be converted to account, contact, and potential. It depends on your organization&apos;s sales process. During lead conversion, all the fields in Lead details are converted to the account, contact, and potential fields.

Note:

  • Once a lead is converted into potential, lead status will be changed to Converted in Leads Home page.
  • You can view the list of converted leads list by selecting the Converted view.
  • Once the lead is converted to account, contact and potential, you cannot revert to the original state.

Lead Conversion Rule

While converting a lead to a potential first a new account and contact are created with the relevant lead data, and then a new potential is created. The following table provides descriptions of the various fields converted to account, contact, and potential (optional) during lead conversion:

Lead FieldConverted To
Salutation Contact: Salutation
First Name Contact: First Name
Last Name Contact: Last Name
Company Account: Name
Designation Contact: Title
Lead Source Potential: Lead Source
Industry Account: Industry
Annual Revenue Account: Annual Revenue
Assigned To Account, Contact, Potential: Assigned To
Phone Account: Phone
Contact: Phone
Mobile Contact: Mobile
Fax Account: Fax
Contact: Fax
Email Contact: Email
Skype ID Contact: Skype ID
Web site Account: Web site
Lead Status Potential: Status
Rating Potential: Rating
No of Employees Account: No. of Employees
Street Account: Street
Contact: Street
City Account: City
Contact: City
State Account: State
Contact: State
Postal Code Account: Postal Code
Contact: Postal Code
Country Account: Country
Contact: Country
Custom Fields Users can map their own custom fields

To convert leads to other sales records

  1. Click the Leads tab.
  2. In the Leads: Home page, select the lead to be converted.
  3. In the Lead: <Lead Name> page, click the Convert Lead button.
  4. In the Convert Lead: <Lead Name> page, enter the following details:
    • Assigned To - Select the user name.
    • Account Name - Display the company name. This field is non-editable.
    • Potential Name - Specify the potential name.
    • Potential Close Date - Specify the potential closing date or select the date from the pop-up Calendar.
  5. Click Save.

Map Custom Fields

(Access Privilege: Customize Zoho CRM)

By default, standard field value of a lead are mapped with the corresponding account, contact, and potential as mentioned in lead conversion table. With the lead conversion mapping tool, you can transfer the field values of the existing standard fields and custom fields to other modules (Accounts, Contacts, and Potentials).

To map lead fields with other records

  1. Click on Setup > Lead Settings > Fields list.
  2. In the Lead Fields List page, click on Map Fields.
  3. In the Map Lead Custom Fields page, custom fields are displayed under Lead Fields column.

Change Lead Status

(Access Privilege: Read/Write permission)

When the prospecting is in progress, it may be very useful to change the status of some of the leads in a single step. Lead status is customizable and your administrator has already configured the Lead Status field as per your organization&apos;s sales process. You can change the status of individual lead or group of leads.

To change the status of leads individually

  1. Click the Leads tab.
  2. In the Leads: Home page, select the lead.
  3. In the Lead: <Lead Name> page, click the Edit button.
  4. In the Lead: <Lead Name> page, change the lead status from Lead Status pick-list.
  5. Click Save to update the lead status.

To change the status of leads in bulk

  1. Click the Leads tab.
  2. In the Leads: Home page, go to the Lead List section and select the check boxes corresponding to the leads. You can also select all the leads.
  3. Click the Change Status button.
  4. In the Leads: Change Status page, select the status from the Select New Status pick list and click the Update Status button.

    Note: Leads status will be changed to a new status, irrespective of its existing status. Use this operation carefully, otherwise leads at different states will be changed to new status violating the organization&apos;s sales process. If you are not sure of using this operation, change the status of leads one-after-another. The other ways of overcoming this problem is first search the leads with a required status then change the status in bulk.

Change Lead Owner

(Access Privilege: Read/Write permissions)

When the prospecting is in progress, occasionally it may be very useful to change the owner of some of the leads in a single step. You can change the owner of an individual lead or a group of leads.

To change owner of leads individually

  1. Click the Leads tab.
  2. In the Leads: Home page, select the lead.
  3. In the Lead: <Lead Name> page, click the Edit button.
  4. In the Lead: <Lead Name> page, change the lead owner from the Lead Owner lookup field.
  5. Click Save to update the lead owner.

To change owner of leads in bulk

  1. Click the Leads tab.
  2. In the Leads: Home page, go to the Lead List section and select the check boxes corresponding to the leads. You can also select all the leads.
  3. Click the Change Owner button.
  4. In the Leads: Change Owner page, select the user from the Select New Owner pick list and click the Update Owner button to change the owner of the leads permanently.

    Warning: Leads ownership will be changed to another user, irrespective of its existing owner. Use this operation carefully, otherwise leads belonging to different users will be changed to new user. To overcome this problem, first you may search the leads with a required owner name then change the owner in bulk.

View Reports

(Access Privilege: Read/Write permission)

You can directly access some of the standard reports pertaining to leads from the Lead Reports section. In addition to reports you can access one of the dashboards in Leads module.

By default, the following reports are displayed under Leads module:

  • Leads By Source
  • Leads By Status
  • Today&apos;s Leads
  • Leads by Ownership
  • Converted Leads
  • Leads by Industry

To view Lead report

  1. Click the Leads tab.
  2. In the Leads: Home page, go to the Lead Reports section.
  3. Click the required Report link. The Report is displayed in Reports page, which can be further customized as per your requirements.

Print Lead Details

(Access Privilege: Read permission)

You can view the lead details in printable form and print them using browser’s Print function.

To print lead details

  1. Click the Leads tab.
  2. In the Leads: Home page, go to the Lead List section and select the required lead.
  3. In the Lead: <Lead Name> page, click on Printable View.
  4. In the Lead: <Lead Name> page, click the Print Page button. You can print the document using the Web browser print function.

Delete Leads

(Access Privilege: Read/Write/Delete permissions)

Occasionally you may need to remove some of the unnecessary leads from the Zoho CRM system for a better user experience. You may consider removing leads that are not useful for future reference.

 Warning: The deleted leads are temporarily stored in Recycle Bin. If required you can restore the deleted leads again. But if you delete leads from Recycle Bin, you cannot restore again.

To delete leads individually

  1. Click the Leads tab.
  2. In the Leads: Home page, select the lead.
  3. In the Lead: <Lead Name> page, click the Delete button.
  4. In the Confirmation dialog, click OK to remove the lead permanently.

To delete leads in bulk

  1. Click the Leads tab.
  2. In the Leads: Home page, go to the Lead List section and select the check boxes corresponding to the leads to be removed.
  3. Click the Delete button.
  4. In the Confirmation dialog, click OK to remove the selected leads permanently.

Customize Leads

(Access Privilege: System Administration)

Customization of the Leads module includes, renaming the tab name, modifying the pick list values in standard fields, adding new custom fields, modifying lead page layout, and show/hide the related list views according to your Lead management process requirements.

For more details, refer to Customizing Zoho CRM

Set up Lead Assignment Rules

(Access Privilege: Manage Lead Assignment Permission)

Edition
Enterprise
Professional
Free
Availability
YES
YES
NO

You can setup lead assignment rules based on your organization-wide lead distribution (based on sales territories) process so that leads generated through import tool are automatically assigned to the respective sales team members.

Lead Assignment Workflow

  • Create lead assignment rule.
  • Associate rule entries to the assignment rule, which contains matching criteria, selecting user, and adding default workflow task.
  • Select the required assignment rule in lead import tool
  • During lead importation, first assignment rule is evaluated and the leads are assigned to the Zoho CRM users according matching criteria.

Limitations

  • You can create up to 20 different lead assignment rules.
  • In each assignment rule, you can associate up to 20 different criteria.
  • Even though you can setup multiple rules, users can select only one rule at a time.
  • Lead assignment rule can be used only for the leads generated through import tool and Web-to-form. You cannot assign leads to users if you are creating manually.

To set up lead assignment rules

  1. Click on Setup > Lead Settings > Assignment Rules.
  2. In the Lead Assignment Rules page, under the Rules List section list of default rules are displayed. Click the Create New Rule button to add a new rule.
  3. In the New Rule page, specify the rule in the Rule Name field and click Save.

    Specify Rule Name
  4. In the Lead Assignment Rule Entry page, under the Rules Entries section list of default rule entries are displayed. Click the Create New Rule Entry button to add a new rule entry.
  5. In the Rule Entry page, do the following:

    1. Specify Criteria: Select the matching criteria to evaluate the rule (Refer to Managing Workflow)
    2. Select User: Select the user to whom the lead has to be assigned.
    3. Add Task: Select the workflow task to be assigned (Refer to Managing Workflow)
  6. Click Save.

    Specify Rule Details

Approve Leads Captured through Website

(Access Privilege: Approve Web-to-Lead Permission)

By default, leads captured through Website are assigned to one of the Lead Administrator who can update the leads with additional information and assign to the corresponding Sales Person in your organization. It will allow your sales persons to focus mainly on high priority leads (lead that contain correct contact information, and interest on your offering).

To approve leads from Website

  1. Click the Leads Tab.
  2. In the Leads Home page, scroll down to the Lead Tools section and click the Approve Leads link.
  3. In the Lead Approval page, view the lead details, assign to specific user, and click the Approve button. After this the lead owner can follow-up the lead.
 For Support (feature requests, issues, implementation questions, etc.,): Click Here

2 Comments  Show recent to old
georgi.b.stoilov, 44 - days ago   

How can I put a security image in order to prevent leads submission from computers?

vidyapriya, 38 - days ago   

Please refer to this sample script and add it in your web page along with
your Web form :

<script>

function randomgen()
{
var rannumber='';
for(ranNum=1; ranNum<=6; ranNum++){
rannumber+=Math.floor(Math.random()*10).toString();
}
document.getElementById('varifyNum').innerHTML=rannumber;
document.getElementById('varifyNumHidden').value=rannumber;
}
randomgen();
//Varification number genarate code End here


//Validation Start Here
function validateForm()
{

var thefrm=document.contactForm;
alert(thefrm);
if(thefrm.enterVerify.value=="")
{
alert("Enter your Verification Code");
thefrm.enterVerify.focus();
return false;
}
else if(thefrm.enterVerify.value!="")
{
if(thefrm.enterVerify.value!=thefrm.varifyNumHidden.value)
{
alert("please Enter Currect Verification Number");
randomgen();
thefrm.enterVerify.select();
thefrm.enterVerify.focus();
return false;
}
else
{
return true;
}
}
else
{
return true;
}
}
</script>


and add the following tag at the end of the form

<tr>
<td style="font-family: sans-serif; font-size: 12px;"
class="feature-border" align="right" nowrap="nowrap"
width="29%">Verification Code:</td>

<td class="feature-border" align="left" valign="middle"
width="66%"><input name="varifyNumHidden" id="varifyNumHidden"
value="701469" type="hidden">
<input name="enterVerify" id="enterVerify" type="text"> <div
id="varifyNum" style="font-size: 14px; font-family:
Arial,Helvetica,sans-serif; font-weight: bold;"></div></td>
</tr>

and also change the form tag as "<form
action='http://crm.zoho.com/crm/WebToContact' name="contactForm"
method='POST' onSubmit='return validateForm()'>" instead of "<form
action='http://crm.zoho.com/crm/WebToContact' name="contactForm"
method='POST' />"

This will help you to prevent the spam.If you need any further
assistance


 RSS of this page


New to Zoho CRM?  Sign up for Free!  or Request a Demo
 
© 2009, Zoho Corp. All rights reserved.