Creating Inventory Templates
To create a template
- Go to Setup > Customization > Templates > Inventory.
- Click + New Template.
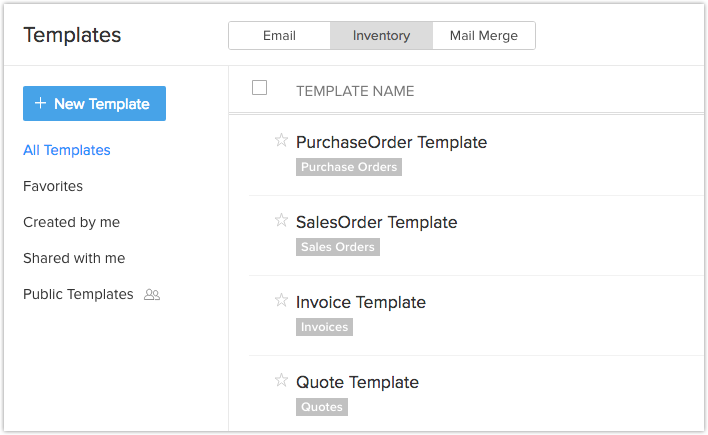
- Select the module from the drop-down list for which you want to create an inventory template. Click Next for the Template Gallery Page.
You can then proceed to create the template in three different ways:
You can create Inventory templates for sending customized quotes, sales orders, invoices, and purchase orders to customers and your suppliers. Inventory templates in Zoho CRM can be created easily using the following ways.
From the Scratch
This makes the creation of inventory templates easier. All you have to do is drag and drop components onto the template to create it. An All Component panel will be available, from which you can drag and drop components. With predefined components, the level of customization needed is very little.
After clicking on the + New Template,
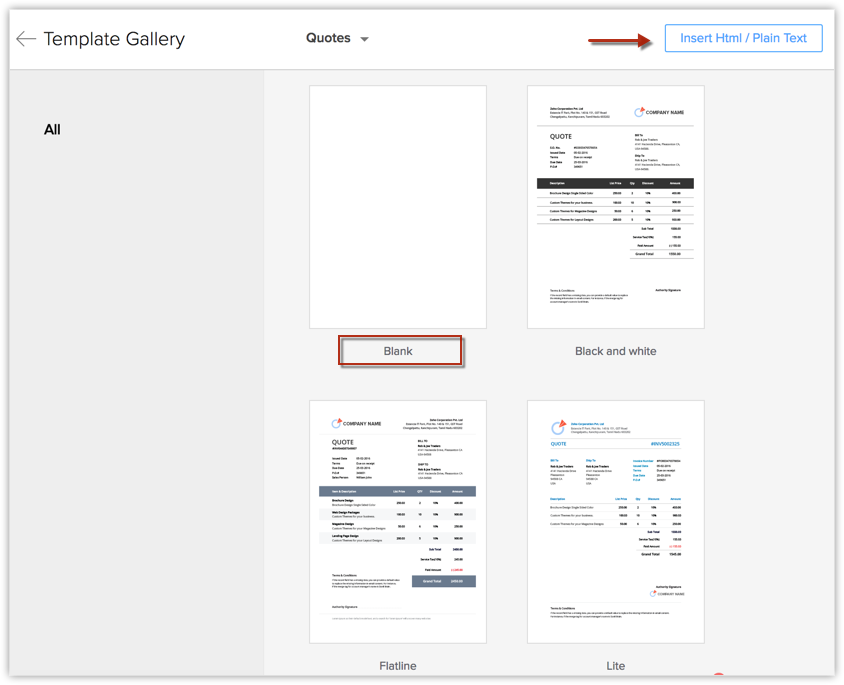
- In the Create Template page, choose a blank template and customize it.
- Drag and drop the components that are required for the Template.

- Save the template and specify the folder the template should belong to.
From the Template Gallery
To make the creation of templates easier, predefined templates are provided in the template gallery. You can choose any template from the list that fits your needs and customize it using the drag and drop editor. You can preview the template before selecting it. Learn more.

Inserting HTML
- In Zoho CRM, go to Setup > Customization > Template.
- In the Template Gallery click on the Insert HTML code / Plain text link.
- Click on the HTML icon, paste your HTML code and click Insert.
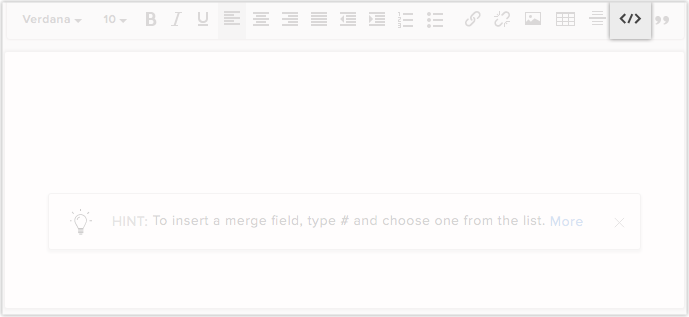
- Click Save.
Inventory Modules
You can select the following primary modules and create templates by linking with other secondary modules:
- Quotes: Quotes, Products, Users, Organization, Accounts, Contacts, Potentials and Custom Modules.
- Purchase Orders: Purchase Orders, Products, Users, Organization, Vendors, Contacts and Custom Modules.
- Sales Orders: Sales Orders, Products, Users, Organization, Accounts, Contacts, Potentials and Custom Modules.
- Invoices: Invoices, Products, Users, Organization, Accounts, Contacts, Potentials and Custom Modules.
- The maximum width of the template is that of the standard width of PDF.
- The maximum length of the template name can be 75 characters.
Organize Inventory Template
Organize your inventory templates into folders. Preview the templates before you save them and also view inventory template analytics to see which ones have had better reach.
Preview Inventory Templates
You can preview the template by clicking on the template from the list. You can view the preview on the list page itself, making it easier for you to view one template after another if needed.
Delete and move templates
At times you may want to delete templates that are not used much, templates that underperform and junk templates. You can delete a template by selecting it and clicking on the Delete button.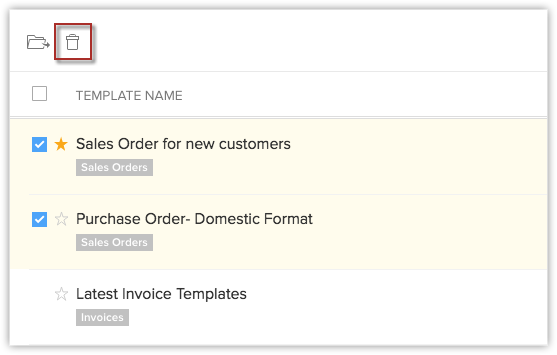
You can move a template from one folder to another. This will be helpful in instances where you have to share a few templates with someone. You can move the needed templates to a folder and share. This can be done by selecting it, clicking on the Move to Folder button and choosing the appropriate folder form the drop-down list. You can also create a new folder and move the template to it if you want.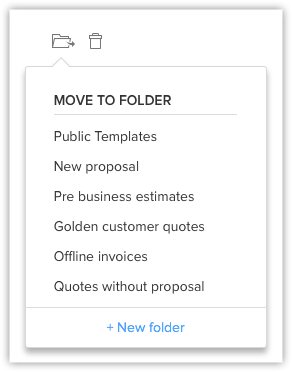
Sort and Search Inventory Templates
Sorting makes it easier for you to access the templates that you need, by bringing them to the top of the list. For example, you can sort the templates in such a way that the most used templates appear at the top of the list. In Zoho CRM you cannot only sort templates, you can also search for templates.
- You have two options for sorting templates based on time.
To sort it based on the last use time, click on the Last Used column. With the help of the Last Used column you can get to know which templates are used the most.
To sort the template based on the modified time click on the Modified Time column.
You can also search and filter templates based on your needs.
- You can search for a template by its name with the help of the search bar provided.
- Choose the module from the drop-down list to display the templates related to that particular module.
Clone Inventory Templates
- Go to Setup > Customization > Templates > Inventory.
- Choose the template that you want to clone and click the Clone (
) icon.
- In the Clone Template popup, enter the Template name and select a module from the drop-down list.
You can clone the template for the existing module. - Click Clone.
Marking Favourites
You may have templates you frequently use and might want those to appear at the top of the list at places where you select templates. For this purpose you have the option of setting templates as favourite by clicking on the star that appears before the template name.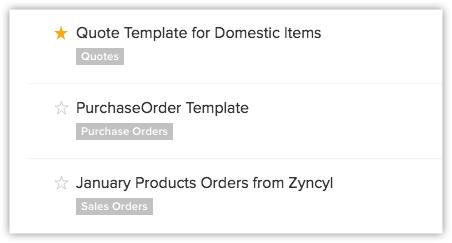
Save template as a Draft
While creating a template you may not always finalize it right away. Sometimes, you may have to add additional details or consult with your peers before removing finalizing the design or make changes based on a discussion with the client. In such cases, you can save the template as a draft to revisit and make changes as per the current requirement.
To save a template as draft
Go to Email templates.
Create a template and add the necessary fields and details to it.
Click Save and choose Save as Draft option.
Working With Template Folders
With template folders you can group similar templates together. When you have a large number of templates, searching for them can become exhausting. By grouping similar templates together, you can easily access them in a single place.
Create a New Folder
By creating a new folder, you can categorize the templates by adding similar templates to the folder. You can create a folder only when you want to save a template or move templates from one folder to another.
- Create a new template.
- Click on Save.
- While saving the template, you will be asked to save it to a folder. To create a folder, click on + New Folder.
- Enter the name of the new folder and choose with whom the folder should be shared.
You can choose to share it with all users, specific users or just yourself.
- A new folder will be created and the template will get added to it automatically.
- If you want to create a folder when moving templates, click on the + New Folder after creating the template and enter the folder details and click Create.
- You have default folders in Inventory Templates like All Templates, Favorites, Created by me and Shared with me.
These folders cannot be deleted or Customized.
Share Template Folders
You can share template folders with other users when needed. When you want to share only specific templates, you can add them to a folder and share them. This might be helpful in cases where the user does not have permission to create templates, but has to send them to customers.
- Click on the more options that appear when you hover the mouse over the template folder.
- Click on Share.
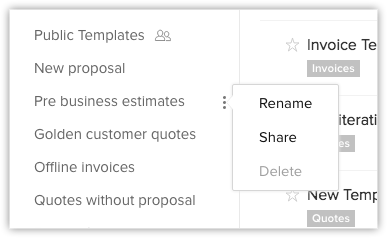
- In the Share Folders section, choose if you want to share the folder with All Users, Only to me or specify the users you want to share with.
In case you chose to select specific users, you can select the source type from the drop-down list and select the users. - Click Done.
Reorder Folders
You would prefer to have the important folders at the top of the list. In order to do that, you need to reorder the folders by clicking on Folders Reorder button. After reordering click Done.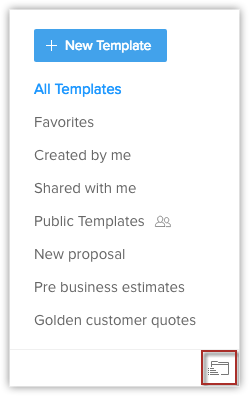
Using inventory templates
The inventory templates can be used in the following three instances:
- Print preview
- Export to PDF
- Send mail
Zoho CRM Training Programs
Learn how to use the best tools for sales force automation and better customer engagement from Zoho's implementation specialists.
Zoho DataPrep Personalized Demo
If you'd like a personalized walk-through of our data preparation tool, please request a demo and we'll be happy to show you how to get the best out of Zoho DataPrep.
- Zoho Workerly Home
- Forums
- Connect With Us:


- Zoho Recruit Home
- Forums
- Connect With Us:
You are currently viewing the help pages of Qntrl’s earlier version. Click here to view our latest version—Qntrl 3.0's help articles.


Zoho Sheet Resources
Zoho Forms Resources
Zoho Sign Resources
Sign, Paperless!
Zoho TeamInbox Resources
Zoho DataPrep Resources
Design. Discuss. Deliver.
Related Articles
Understanding Inventory Template Builder
Components of Template Builder The template builder is made up of various components that can be dragged and dropped on to the template. Header and Footer Header and footer are available at the beginning and the end of the template. You can add them ...Managing Mail Merge Templates
Mail merge is a function that helps you to simplify repetitive tasks to create personalized documents (forms, letters, address labels, envelopes, etc.). You can create a mail merge template which contains variables (merge fields), which will merge ...Troubleshooting Email Templates
1. Product details are not populated in the table created in a template. Product details will only be available if the default product table in the template has been added. If the fields in the Product Details section are added separately, the values ...Creating Email Templates
Communicating with customers is an important activity in any business scenario. Zoho CRM provides Email Templates to send one message to multiple recipients. Email templates can be also be used to send Mass Emails to leads/contacts or send Email ...Creating Quotes
In Zoho CRM, you can store quote details by manually entering the data in the quote details form. Note Some of the standard fields may not be visible or editable depending on your organization business process. In case you want to add or modify ...